This tutorial will help you set up MDriven Turnkey on Microsoft Azure.
All the components needed to run MDriven Turnkey (the latest versions of MDriven Server & MDriven Turnkey) are available here for MDrivenServer and here for MDrivenTurnkey - you will need both.
You can run MDriven Turnkey on your Azure account or set it up on your local IIS. To set up on a local IIS, see Installing MDriven Server on Windows.
Setting Up Azure
Go to https://portal.azure.com and log in under your existing account or create a new one.
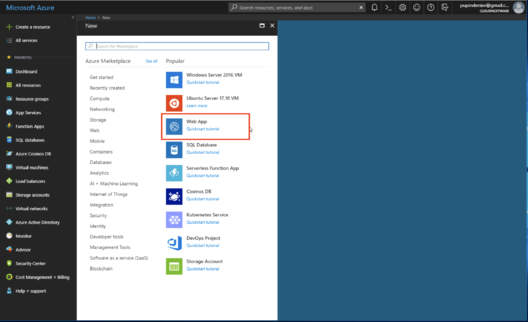
First, you need to create a new Web app to run your Turnkey and MDriven Server application.
Create two Azure apps, one to run the MDriven Server and one to run the MDriven Turnkey
To run both the MDriven Server and Turnkey in one Azure app continue below.
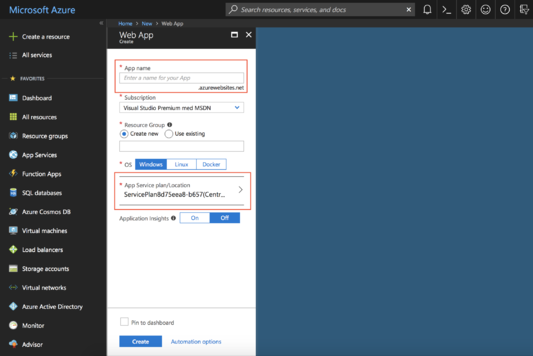
Enter the name of your application and create or choose an existing App Services Plan.
Pushing App Files To Azure
Now, we need to download the publish profile - go to "Overview" and press "Get publish profile".
Azure provides many different methods to publish your application files including Zip Deploy, One Drive, Github, FTP and many more.
Installing MDriven Turnkey
Download the latest MDriven Turnkey from https://mdriven.net/downloads
Push the App Files to site\wwwroot directory of your Azure App
Installing MDriven Server
Download the latest MDriven Server from https://mdriven.net/downloads
Push App Files to site\wwwroot directory of your other created Azure App
Running the Turnkey and MDriven Server in one Azure App
To run the MDriven Server and Turnkey in one app
Upload the Turnkey app files to site\wwwroot directory
Upload the MDriven Server app files to site\wwwroot\__MDrivenServer directory
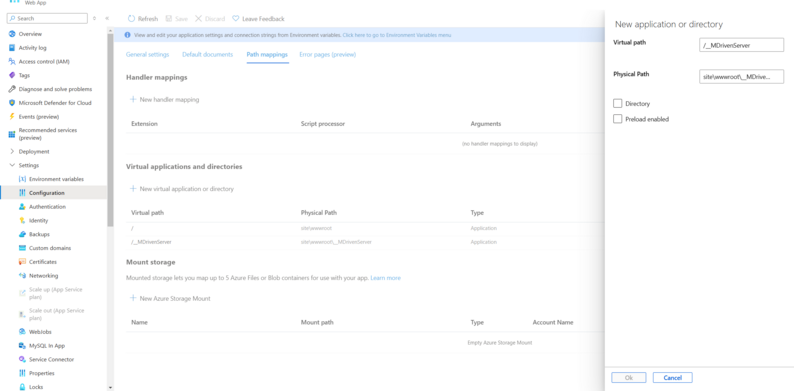
With the Azure App Panel Goto Settings > Configuration > Path mappings
The MDriven Turnkey will run in the default directory site\wwwroot
Create a new virtual application for running the MDriven Server
Virtual path: /__MDrivenServer
Physical Path: site\wwwroot\__MDrivenServer
The MDriven Server will now be accessible at <Your Azure App Domain>/__MDrivenServer/
Don't forget to make sure the __MDrivenServer is of Type Application. Do not check any of the check list items
Setting up MDriven Server
Within the MDriven Server app files
Create a CommandLineOverride.xml file in the location App_Data/CommandLineOverride.xml specifying the location of MDriven Server. This a requirement of .NET Core applications using IIS.
Contents of CommandLineOverride.xml
<root>
  <arg>iis=https://<Your Azure App domain>/__MDrivenServer</arg>
</root>
Reset the MDriven Server password for User Name: a using PwdReset file
Create a PwdReset.txt file with the new password in the location App_Data/PwdReset.txt
Push updates to the Azure App and try to login to the MDriven Server with User Name: a and new password.
Delete PwdReset.txt file after testing the new password.
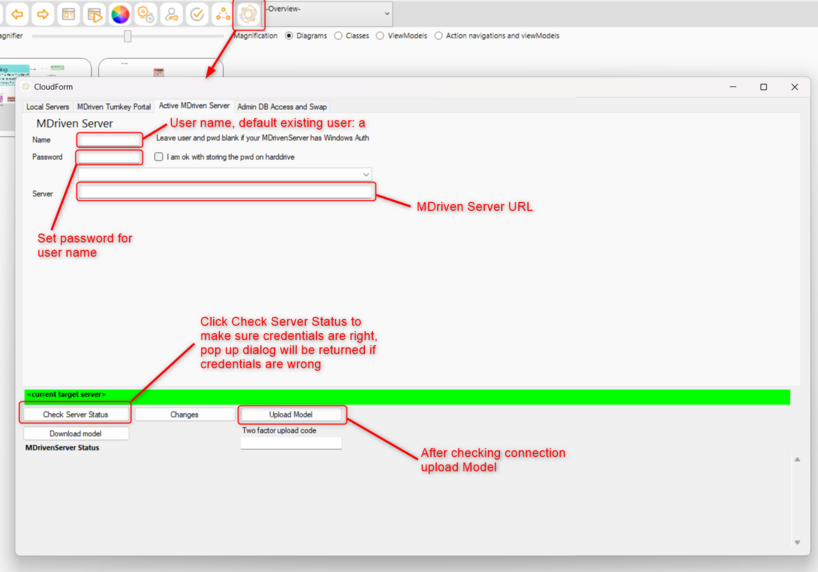
Upload the model to the MDriven Server with new set credentials
Setting up MDriven Turnkey
Within the MDriven Turnkey app files
Create a CommandLineOverride.xml file in the location App_Data/CommandLineOverride.xml specifying the location of MDriven Turnkey. This a requirement of .NET Core applications using IIS.
Contents of CommandLineOverride.xml
<root>
  <arg>iis=https://<Your Azure App domain></arg>
</root>
Connection to the MDriven Server
Create a MDrivenServerOverride.xml file in the location App_Data/MDrivenServerOverride.xml specifying the url of the MDriven Server that the Turnkey should connect to.
Contents of MDrivenServerOverride.xml
<?xml version="1.0" encoding="utf-8"?>
<root>
  <MDrivenServerOverride MDrivenServerPWD="<Password for a user>">https://<Your Azure App Domain>/__MDrivenServer/</MDrivenServerOverride>
</root>
Turnkey Settings
Create a TurnkeySettingsOverride.xml file in the location App_Data/TurnkeySetttingsOverride.xml
Check here from more Turnkey settings tags
Contents of TurnkeySettingsOverride.xml
<?xml version="1.0" encoding="utf-8"?>
<root>
    <ShowDebugInfo>True</ShowDebugInfo>
</root>
After ensuring the Turnkey connects to the MDriven Server when you are able to access the Turnkey Application turnoff debug info by setting it to False.
Important To Know
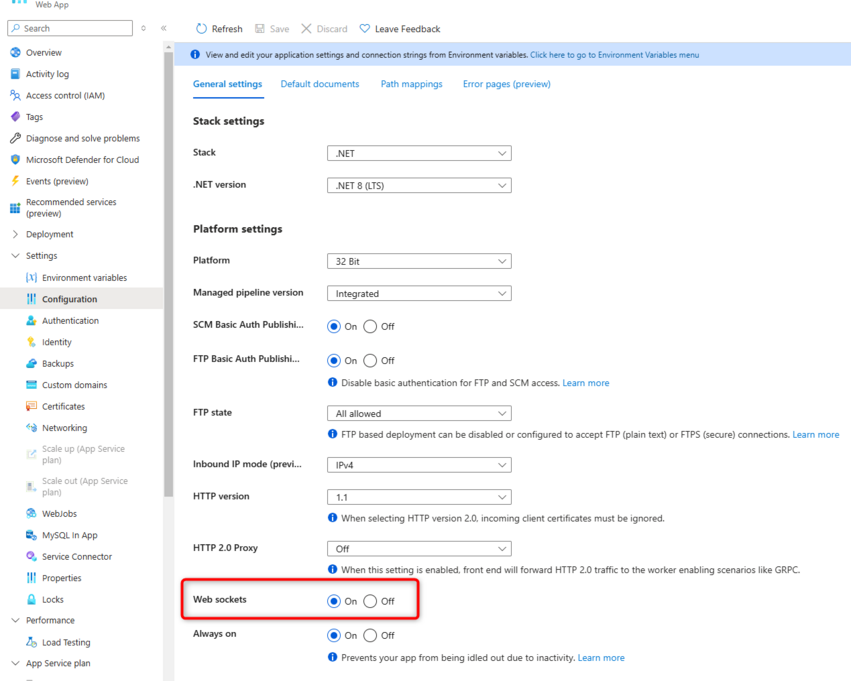
- Turn on websockets for the Azure App as this is required for the MDriven Turnkey and Server to communicate properly.
When all these steps are done, we are ready to go to https://portal.mdriven.net
NOTE: It is best to do at least the first deploy with Portal (as described below) since you then get the strong password set and init files updated for your installation - but after initial setup, you can easily deploy new code for Turnkey + server via OneDrive as described here: Deploy_Turnkey_on_your_own_Azure_with_OneDrive
Setting Up on MDriven Portal
Open https://portal.mdriven.net and log in under your account.
Go to "Views" -> "Show my Turnkey Sites" and "Register a New Site".
Name your application and upload the publish profile to MDriven Portal and press "Create Turnkey Site" and "Save".
Now, go back to "Show my Turnkey Sites" where you can see that your new site is registered, but not deployed. Click on it and choose "Manage Turnkey Site".
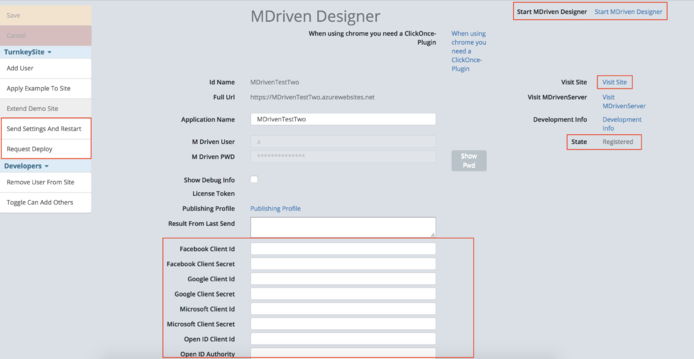
On the "Manage" page, you can request a deploy of your website. To request deploy, you need to press the "Request Deploy" button and save it. Deploy takes no more than 5 minutes. When the status of your site changes to "Deployed", press "Send Settings and Restart" and save.
After these steps, you can revisit your site and see your Turnkey application.
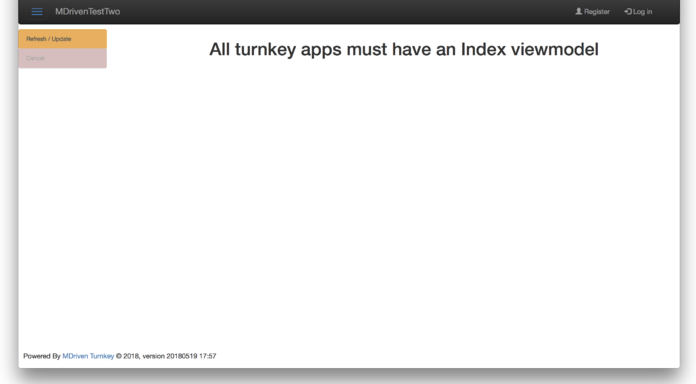
NOTE! Each Turnkey app must have an Index ViewModel.
You can go back to https://portal.mdriven.net/ and open MDriven Designer to start modeling.
The MDriven Book - Next Chapter: Set up MDriven Turnkey on premise
Video Tutorial
To make your experience smooth, we set the main tags mentioned in the video to the right bar menu of this mini-player. Choose an interesting subtitle on the list and immediately get to the exact theme navigation item place in the video. Now you can pick any topic to be instructed on without watching the whole video.

